Administrative Setup Methods
Overview
The administrative setup of contacts is a method that can add an extra layer of security, visibility, and consistency on your Kore Commerce site. Effective for certain B2B operations, the administrative involve an administrator to add a contact into your site.
There are two methods where an administrator is involved in adding a new contact into your site. These are:
-
The Manual Entry Approach
-
The Requesting Access Approach
Below, we’ll go into each method, how they work, and the proper way to execute them, starting with manual entry approach.
The Manual Entry Approach
Manually entering and maintaining contacts is useful if you want to account for and maintain each contact on your Kore Commerce site.
The easiest place to start this process is on the Contact Listing page, where you can add new contacts and search for existing contacts. On this page, there is an Add Contact button. This button is circled in the Contact Listing page image below:
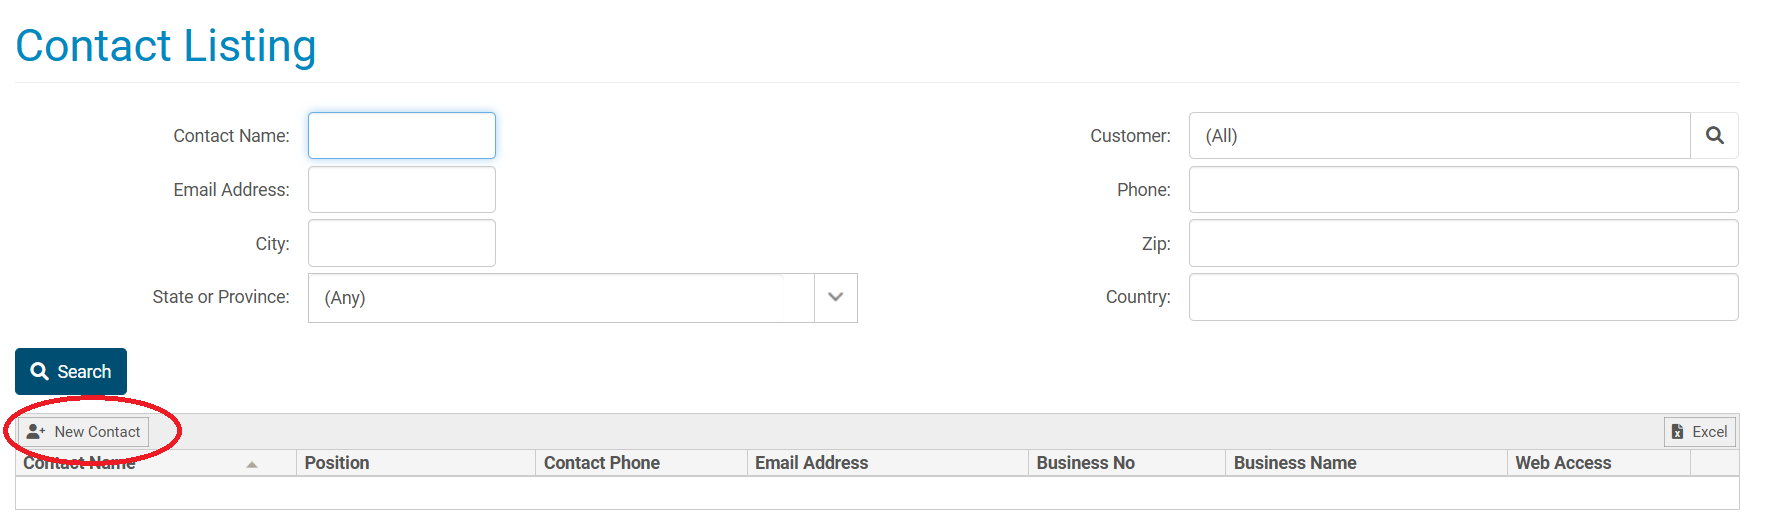
Here, you should press the Add Contact button to create a fresh Contact Definition page. On this page, you will be presented with a number of empty fields where you can input the required and relevant information about the new contact you are adding.
A newly created Contact Definition page should like the following image:
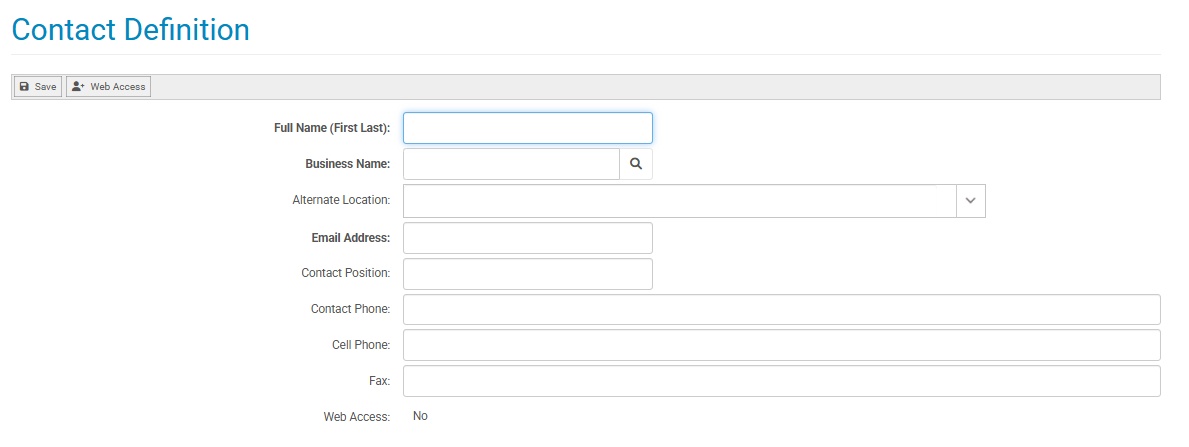
At this point, adding a new contact requires you to enter a name and a valid email address into the respective fields. As well, you a new contact is also required to be tied to a business within your Kore Commerce system. You can search for businesses in your system by pressing the spyglass icon next to the Business Name field, bringing up the Customer Search page in a pop-up window.
The Customer Search page should appear like the image below:
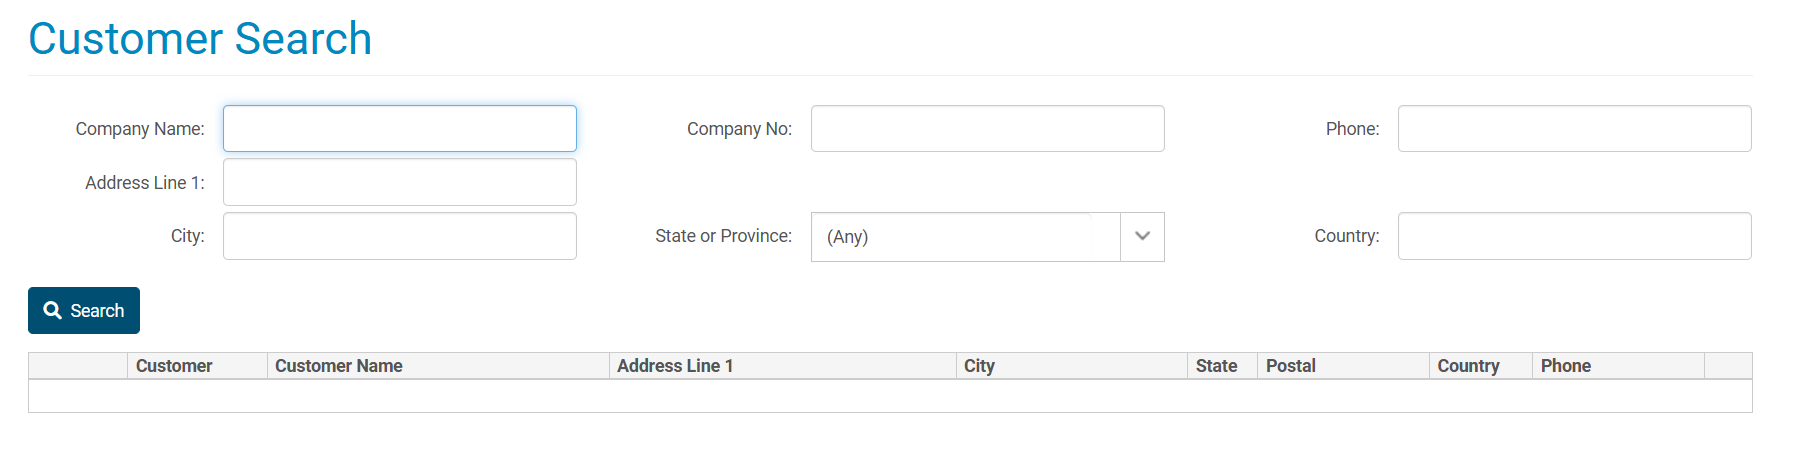
On this page, you can fill in any of the fields with information you know about a business (including name, company number, phone number, address, city, state, and country), then press search to filter through and located the business tied to your new contact. After you select the business you want, the Customer Search page window will close, and the business name field (and alternate location field, if applicable) will be filled.
From this point, after filling out the required fields, there are two options. You can either save the contact as-is, or continue on to setting up their user.
Saving the contact as-is will register their contact information into your account. However, doing so will NOT allow create a user account for contact, preventing them from gaining user access to your site. As such, saving a contact as-is is primarily useful for simply logging contact information into your site without creating an account for that contact.
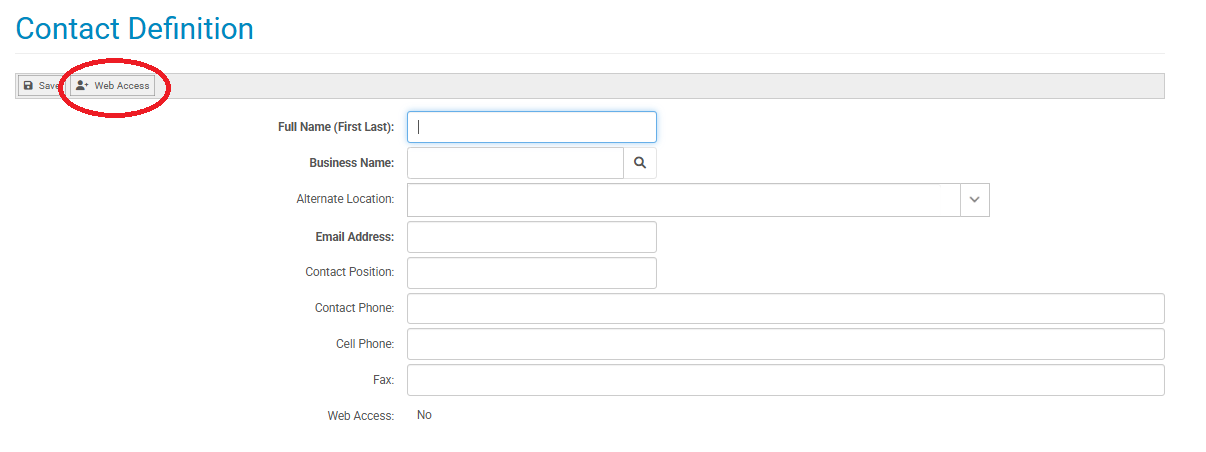
If, however, you opt to continue on and set up the contact's user account, you will want to press the Web Access button on the new contact's Contact Definition page. (Note- you must first enter the require fields on the Contact Definition page (name, email, and business name) for the Web Access button to work). Pressing the Web Access button at this stage will create a new User Definition page linked to the contact you have just created. The Web Access button is circled in the image below:
After selecting the Web Access button, the User Definition page should look like the following image:
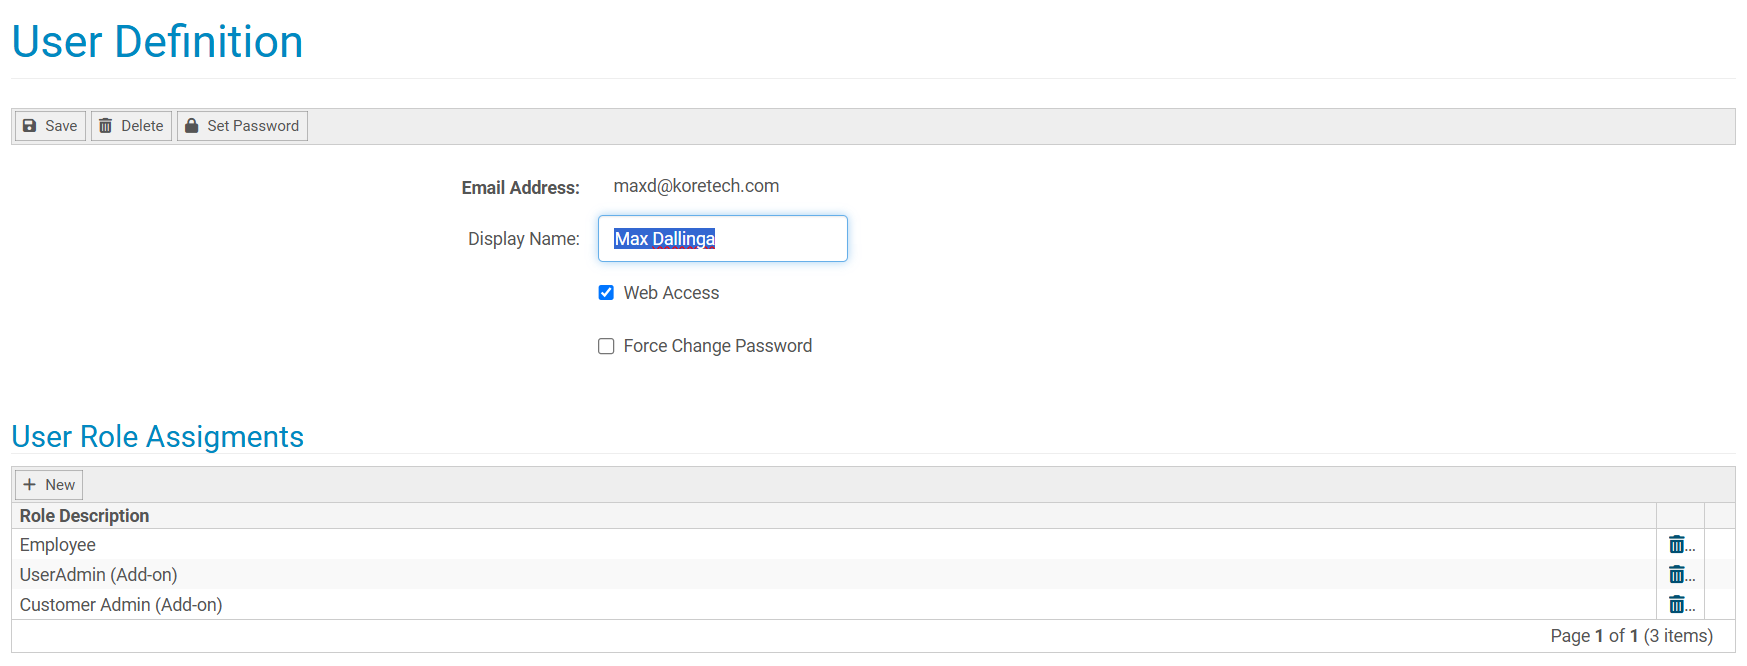
If you want a user to have access to their account, ensure that the Web Access checkbox is selected. If web access is disabled, the contact will be effectively blocked from their user account (and will not receive an email to set up their new account). You can also choose their User Role assignments, which determine what permissions the user will have on your site. For further information about this page, please visit the User Definition section of this guide.
Once you've finished establishing your new contact’s user Web Access permissions and role assignments, you can press the Save button, which will officially establish their contact and user account information into your site.
After saving, the contact should receive an email that looks like the demo email below:
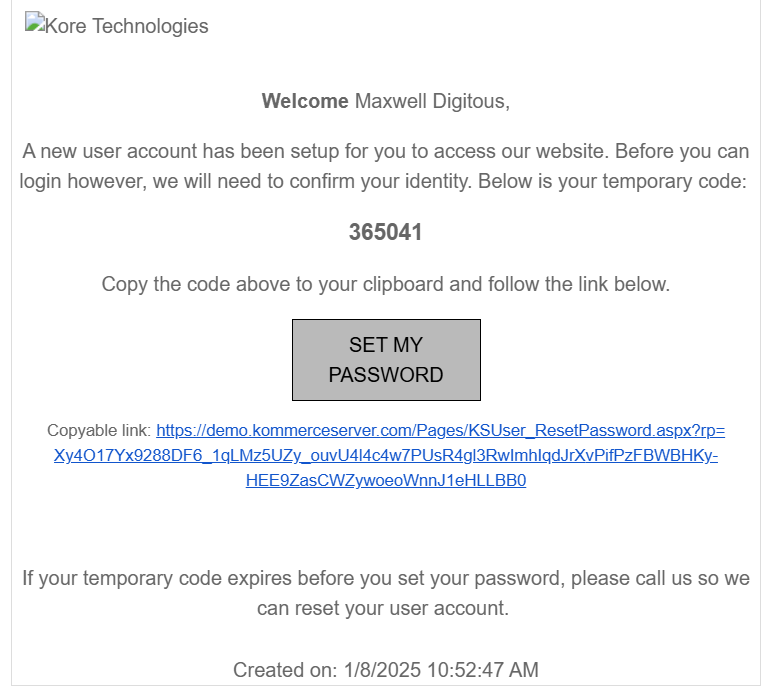
(If your new contact is having trouble finding an email from your system, have them check their spam folder. To customize these emails, check out the Notification Template page of this guide. For further information, please visit the Changing a Contact's Email section of this guide.
From here, your new contact will be able to set up their account by pressing the Set My Password button on the email. This button will take them to the New Account page, where they can enter the temporary verification code provided by the email, then be taken to the Set Password page to enter their desired password.
After establishing their new password, your new contact will now be able to properly access their user account on your site!
The Request Access Approach
The request access approach to adding contacts into your Kore Commerce system is similar to The Self-Registration Approach,only with an administrative barrier to entry added. This method is useful if you are a looking to add an approval process when allowing anonymous contacts to create user accounts on your Kore Commerce site.
In this approach, a new contact will fill out a form with their information. This form will then be submitted to you, the administrator, who can then approve or deny their access to a new user account.
On the login page of your online store, a new contact will be presented with a Request Access prompt. This should look like the following image:
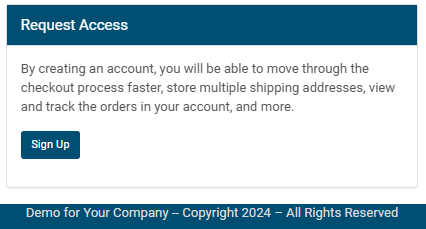
When the customer clicks the Sign Up button, they will be taken to a fresh Request an Account page. This page will look like the image below:
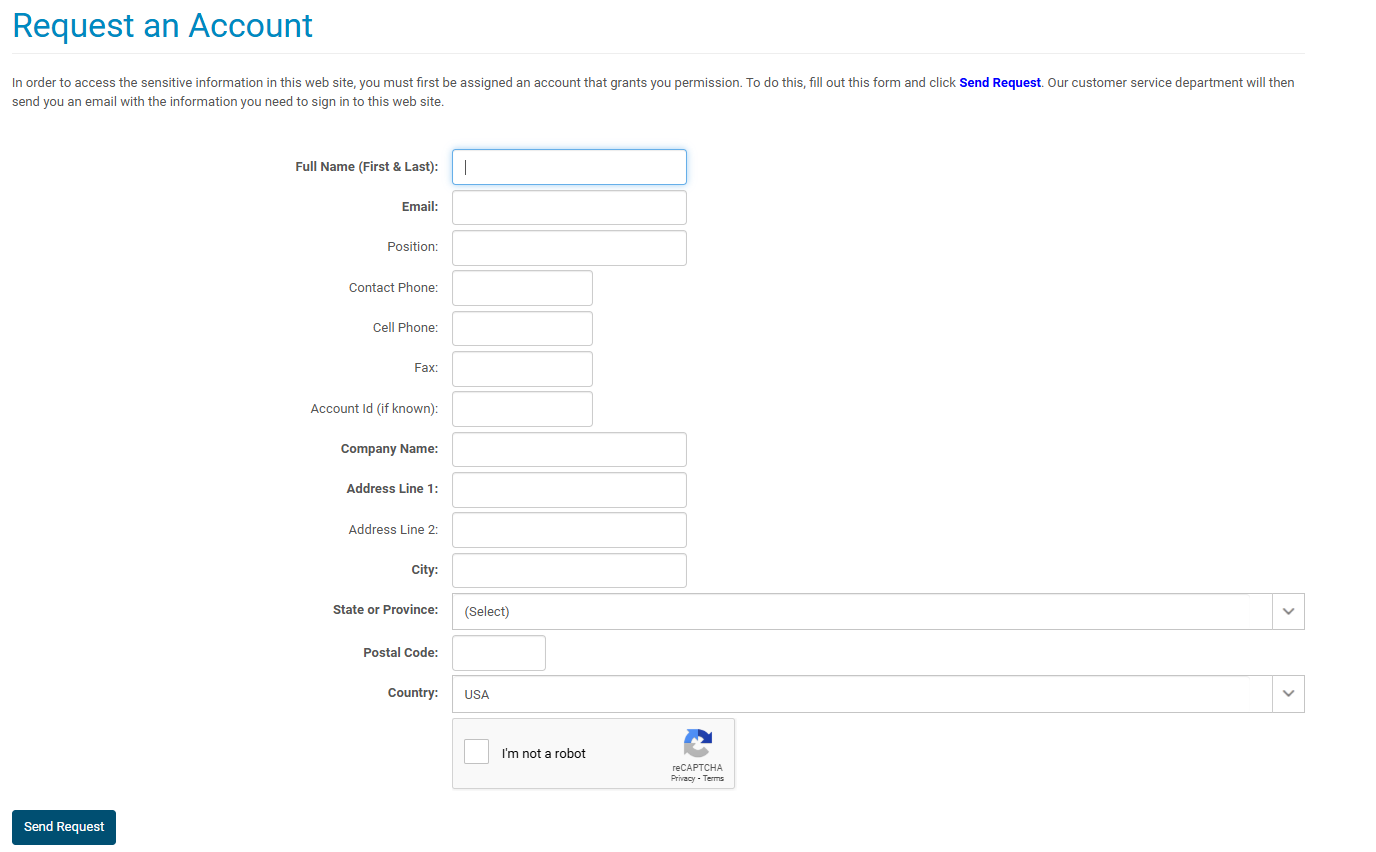
The fields and commands seen on the Request an Account page are listed in the tables below:
| Fields | Description |
|
Full Name (First & Last) |
The name field is where a requesting contact enters their name (first and last). This field is required. |
|
The email field is where a requesting contact enters a valid email address for their account. This field is required. |
|
| Position | The position field is where a requesting contact can enter their job position. |
| Contact Phone | The contact phone field is where a requesting contact can enter their primary phone number. |
| Cell Phone | The contact cell phone field is where a requesting contact can enter their cell phone number. They can also enter this number into the contact phone field if it is their primary phone number. |
| Fax | The fax field is where a requesting contact can enter their fax number. |
| Account ID | The account ID field is where a requesting contact can enter their business account ID. |
|
Company Name |
The company name field is where a requesting contact enters the name of the company that they are associated with. This field is required. |
|
Address Line 1 |
The address line 1 field is where a requesting contact enters their primary address. This field is required. |
|
Address Line 2 |
The address line 2 field is where a requesting contact can enter their alternate address. |
|
City |
The city field is where a requesting contact enters the city in which their primary address is located. This field is required. |
|
State or Province |
The state or province field is where a requesting contact enters the state or province in which their address is located. This field is required. |
|
Postal Code |
The postal code field is where a requesting contact enters the postal code of their primary address. This field is required. |
|
Country |
The country field is where a requesting contact enters the country in which their primary address is located. This field is required. |
| Commands | Description |
|
The CAPTCHA command is used to ensure that a real human is requesting to enter your site. When a requesting contact clicks on the CAPTCHA and is confirmed as a human, they will be able to register your account. |
|
|
The send request command will submit the contact's request for a new user account to your system. The requesting contact must correctly fill out all of the required fields and pass the CAPTCHA for the send request command to work. |

After finishing this process and submitting a request for a new account, the request will be sent to your system. From here, the contact will be sent to a page that will inform them that their request has been received, and that they will receive the information neded to sign into your site once the request has been approved by an administrator on your site. This will look like the image below:

At this point, all there is left to do is to accept the requesting contact's request for an account. A request object will be created on your site, and you should receive an email notifying you that of the request. If you choose to accept the request, an email will be sent to the contact's submitted email address with the information needed to finish creating their user account.
From here, all that is left to do is for your new contact to set up their password and finish their account creation process.
Administrative Setup Page Summary
There are two ways in which an administrator on your Kore Commerce site can set up or mediate the process of contact and user creation. Through the manual entry approach, an administrator on your Kore Commerce site can input contact information and setup a linked user account. Through the request access approach, you can allow a user to enter their information and submit a request form that an administrator can either accept or decline.
In both methods, a new contact goes through a level of administrative presence when creating an account on your site. Each of these elements can add a layer of security, visibility and personalization to the contacts and users interacting with your site.
Troubleshooting and Additional Information
-
If a contact does not receive an email with or otherwise loses their temporary verification code, there are a number of ways in which an administrator can help them set up their account password. These are listed on the Changing Contact Passwords page.
-
To learn more about customizing request objects, events, and emails, please visit the Events section of this guide.
Related Topics